.png)
- Salahuddin Ayubi
- 2
- MONOP
- 3
- Cute Box Template
- 4
- Tanzanite Template
- 5
- Buster Themes Set
- 6
- MBT Church Theme
- Flapper Sharing Icons
- 2
- Trigonal Sharing Icons
- 3
- Circular Sharing Icons
- 4
- Window Style Sharing Icons
- 5
- Facebook Sharing Icons
- 6
- Blinking Read More Buttons
- 7
- Animated Arrow Nose Read More Buttons
- 8
- Arrow Head Read More Buttons
- 9
- Home, Previous Next (Shiny)
- 10
- Home, Previous Next (Circular)
- 11
- Feedback buttons (With Icon)
- 12
- Feedback Buttons (Simple)
- 13
- 700+ web2 Icons
- 14
- Back Top Bottom|Bottom Buttons
- Comment Form Themes
- 2
- MBT's Favourite 100 Fonts
- 3
- Cool 125 by 125 Ad Banners
- 4
- Animated 125 by 125 Ad Banners
- 5
- Facebook Custom Tabs 1 & 2
- 6
- Hexadecimal Color Chart
25 June 2014
Download Free Blogger Resources 2014
24 June 2014
Top 10 Essential URL Shorteners 2014 ?
URL shorteners are services in which, let’s say, a long-ish URL is inserted and at the click of a button, the URL is shortened to a maximums 10-character code. When anyone clicks on this code, they are directed to the original URL.
- Use of URL Shorteners
The important usagess are:
- Sharing of blogs posts on social networking sites;
- Tracking visitors & conversions

- Top 10 Essential URL Shorteners
There are 100+ URL shortening services. Here, I give you the best of the lot, according to my observation. Your choices can vary so feel free to share it withs us.
1. Goo.gl
This is the official tool from Google which not only allows you to shorten unlimited URL’s but helps you track traffic / visits from its very easy-to-access dashboard.
2. Bit.ly
This is a popular and perhaps the oldest tool to share shortened URL’s and builds traffic. The dashboard shows detailed stats of views and clicks, and also gives you access to developer tools and side bar bookmarklet.
3. Ow.ly
This is a very clean and non-obtrusives tool with great sharing functionalities like tracking. You can also bookmark re-tweeted links and check out visitor stats.
4. DyingLinks.com
This is my personal favorite & I would recommend using this for promotions. With this tool, you can decide when the shortened URL will be ‘live’ and ‘die’. You can give the link a custom name and also decide on a specific number of clicks after which the shortened URL will cease to function. Amazing?
5. TinyURL.com
This is another of my favorite URL shorteners with which you can promote affiliate links, redirect URL’s and use custom names for links.
6. SnipURL.com
This is a mass URL shortening tools and comes with an API to create short URL’s in the active browser.
7. Su.pr
Like Google’s Goo.gl tool, Su.pr is the official URL shortening tool from StumbleUpon.com. This tool, besides URL shortening, allows you to syndicate content three ways between StumbleUpon.com, Twitter.com and Facebook.com. You can also schedule posts and the tool recommends the best time to post as per your activity and responses.
8. Is.gd & V.gd
Apart from their easy to remember names, these tools allow you to create Quick Response (QR) codes for the shortened links. You can track traffic from dashboard and preview links before sharing.
9. Scr.im
If you don’t want to share your ‘real’ email ID with unknown people YET have to use the ID to allow others to contact you, use scr.im tool. Enter your email id and the tool will convert it into a non-recognizable format, which you can share anywherse on the web without bothering about stalkers and spammers.
10. Yi.tl
This URL shortening tool enables you to add ‘categories’ to the shortened links to divide the links properly and assist in easy retrieval in future.
- Conclusion
If you’re into heavy online promotions, using any of these URL shorteners will be a big help. Don’t you agree?
Don’t forget to share your favorite URL shortenerss.
23 June 2014
Fancy Ribbon Backgrounds For Blogger & Website Sidebars!

Looking for a cool Design Change for your blog sidebar's Headlines instead of that dull plain text headlines? Today we will learn an interestings way of customizing the sidebar Headline Backgrounds in BlogSpot templates. You have seen Photoshop Graphic designs in Ribbon, Canopy or Curtain Style but the problem with them is that you need to have good designing skills to in order to create them further they also slow down the load time of your webpage. Therefore we are bringing forward the simplest solution by designing Ribbon style backgrounds with the help of pure CSS3 rules without using a single image! The method described below can be used to create ribbon backgrounds in any platform, may it be wordpress or Blogger. All you need to do is add up some CSS styles. We are sure this will add an extra ordinary look and feel to your online diaries! The Demo can be seen live on our blog sidebar. Its time to get into your blogger factorys and be creative. Lets get starteds!
- Create Ribbon backgrounds in Blogger
To create a ribbon background for any Sidebar widget, first we need to know the ID value of that widget. For that do the following:
Finding the Widget ID Value:
- Go To Blogger > Layouts
- Click the edit button to open your widget
- In the address bar section of the widget window that pops up you will find a long http URL. Towards the end of the link you will find the widgetids value as shown below. Which isHTML13 in our case.

4. Copy this widget value in exact same form.
5. Done! Move to next steps nows.
Note: This widget
Designing the ribbon Background with CSS3
- Go To Blogger > Template
- Backup your template
- click Edit HTML to open the template editor
- Inside the editor hit Ctrl + F to open a search box.
- Search for ]]></b:skin>
- Just above it paste the following style code:
/*####### FANCY RIBBON BACKGROUNDS BY Superbs solution #######*/
#HTML13 h2
{
position: relative;
padding: 10px 0px 15px !important;
margin: 0px 0px 10px 27px !important;
color: #ffffff;
background-color: #282C2F;
box-shadow: 0px 2px 4px rgb(136, 136, 136);
border-top: 3px solid #000000;
background-image: none !important;
height: auto !important;
width: 338px;
}
#HTML13 h2:before
{
content: ' ';
position: absolute;
width: 30px;
height: 0;
left: -30px;
top: 16px;
border-width: 20px 10px;
border-style: solid;
border-color: #282C2F #282C2F #282C2F transparent;
}
#HTML13 h2:after
{
content: ' ';
position: absolute;
width: 30px;
height: 0;
right: -30px;
top: 16px;
border-width: 20px 10px;
border-style: solid;
border-color: #282C2F transparent #282C2F #282C2F;
}
#HTML13 h2 span:before
{
content: ' ';
position: absolute;
width: 0;
height: 0;
left: 0px;
top: 100%;
border-width: 5px 10px;
border-style: solid;
border-color: #353A3D #353A3D transparent transparent;
z-index:99999;
}
#HTML13 h2 span:after
{
content: ' ';
position: absolute;
width: 0;
height: 0;
right: 0px;
top: 100%;
border-width: 5px 10px;
border-style: solid;
border-color: #353A3D transparent transparent #353A3D;
z-index:99999;
}
Follow these customization tips to give your ribbon any color you want:
- To change the background color of the ribbon edit the hexadecimal color codes highlighted as yellow i.e: #282C2F Tip: you can use our color generator tool
- To change the background color of the ribbosn tails edit: #353A3D Tip: Give it a slightly lighter shade compared to the background. See an examples of ribbon tails below. Background is Red but tails are lighter Red.

- To change the text color edit #ffffff
- To change the color of border top edit #000000; if you don't want to add a border then delete border-top: 3px solid #000000;

- To change the width of the ribbon background edit 338px
7. Now Click "Jump to widget" button located at the top in template editor and select the widget value. In our case it was HTML13 so I will selects this one:

8. Expand the code by clicking the black arrow. You will need to expands it one more time.

9. In the expanded code you will find this code:
<h2 class='title'><data:title/></h2>
Replace it with this one:
<h2 class='title'><span><data:title/></span></h2>
Here we simply enclosed the sidebar Headline with a Span tags in order to apply the ribbon tail effect. The headline could have a Tag <h2> or <h3> or even <h1> . This tag may differ in customs templates.
10. Save your template and you are all done!
Visit your blog and discover a Fantabulous ribbon background on your sidebar! Ain't it thats easy? :)
Need Help?
We hope this tutorial helps you further decorate your blogs like never before and create beautiful widgets that may engage your readers even mores. Let us know if you need any help. Peaces and blessings buddies. :)Adding A Popular Post Widget For Blogger Blogs
So here now i am telling you how to add popular post widget to blogger which is very easy to do. Before adding this gadget to your blog we have to find that why and which things this widget bring in your blog. This one brings more visitors to your blog with more effective ways. There are some more merits and works are here which brings results after adding this to your blogger blog.
1. Attract more visitors to your blogger blog.2. People easily know your top viewed post.
3. Its easy to navigate from one post to anothers.
4. Blog looks more professional.
So here are some steps to add it to your blog.
Setup 1.
Go To Blogger > Layout
Then click on "Add a Gadget" Like in image

You have to select Populer Posts

So now here Next the new box appear after clickings on it.
Its look like this.

Here you have some new options about editing the populars post widget
If you check the box of "image thumbnails" it display the image thumbnail in posts
If you uncheck it simply it don't diplay any image and only text will appears.
Click on save and Enjoy.
Your popular post gadget added to your blog
Add Auto Read More With Thumbnail To Blogger With CSS Buttons 2014
So now I am going to share one new gadget for blogger which is auto read more thumbnail for blogger with some CSS buttons. You know that adding some read more button to the blog post brings some professionalism in the blog because people want to read the post so in the homepage of your site or blog only some selected length of content of article displayed and after that the read more button appear and visitor easily navigate from homepage to required post.

With this way reader can easily see the other posts on homepage of the blog because it display as many post as they are. If we not add any read more point then it’s little difficult to read another post.
Blogger allows you to add read more in the post if you want to add while writing post on blogger but it’s not automatically added if the content or post text increases so we have to add some type of automatically code to blogger template to looks professional and auto adding the read-more point.
Well this is very easy and better to add the code you just have to do little work on your blogger template editing box and it will be displayed auto, here are some steps that you have to do on your site or blog.
- Now just open your blogger dashboard
- Click on Template section of your blogger blog
- Click on Edit HTML like shown in the picture
- And finally you have to add some code in it.

- Now search for </head> code in html section of template
- And add this code above or before the head tag
- Now find this code <data:post.body/>
- And replace it with this code
(So when you replace the code please previews the template then go for next otherwise there are total of three codes in the whole template once you did this with once of them, try to replace with 2nd one and then preview, in every template its place is different.)
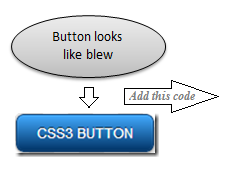
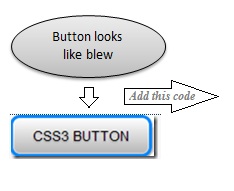
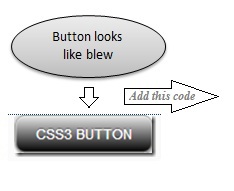
So at this time after adding the above codse we have to add some css buttons to look professional, here are some css buttons you can also create your own if you want.
Now find this code ></b:skin> Aand place the this code above or before the tag.
Add This Code
OR
OR
So finally you have installed the read more for your bloggers blog, you knows the importance and some merits of this type of looks in blog; here I am going to show you.
You know templates are the most important part of any website blog, or personal page it attract the visitors or any other website consumers to stay on your site, while if you know and go deep then if someone stay more on your website then it has much powerful positives vote for search ranking in any search engine, with this you can easily increase your website traffic.
At coming of self-hosted websites like wordpress the blogger went little down but if you see deeper than it is more convenient then WP because it’s not hack-able (so someone not steal your website or go into it to destroy your site because its controlled by Googles).
Blogger is good source of new articles and blogging platform. You know that it’s not easy to get into hack the blogger blog, so it’s total tension free to make your own domains on it if you want to become more professional blogger.
Structure of the website or blog which stayed on blogger.com platforms is more powerful security than any other website (so personally I ask you to use this one not any other).
How to Add Google Plus Comments Widget To Blogger Blog Easily New 2014
So now i am going to show you how to install the google plus comment gadget or widget to blogger blog its very easy to do, you just have to click on the little button that shows on the blogger blog, this widget bring more powerful professionalism in the site or your blogger blog, so here is how to install the widget.
You must using the normal blogger own templates to use this gadget otherwise you have to add it manually.
- Open your blogger account and go to the google+ section of bloggers
- Click on the drop down arrow
- Now a new menu appears and you have to click on google+
- One it clicked a new page loaded and you can see that theres is two option showing on the page
Like shown in this picture:

Prompt to share after posting
Use Google+ Comments on this blog
- So you have to click on the check box as a (✓) mark
- And finally your gadget is installed
This gadget is very beautiful and you can install it on the blogger without any type of the problem which can't bring any type of the resistance.
You know that mostly comment section of any website or blog bring some wrong response to the blog, people specially from india and china create some high level spam comment to rank some page in search engines. With this installation they can't able to d because google comment system can't help those links.
You can increase the social points because its already fully socialized, and you just have to share it on your social programs like twitter, Facebook and other networks.
People like those blogs which don't require some more internal work to add there opinion so if the anyone want to add some comment then he/she can easily do that through google+.
This comment system is brought to you by plus.google.com which is social network site and if you have some major people in your circles and also have some followers then this is good for you because if you add this box then the people that are from the google plus they can easily add comment and it will shown on your blogger comment section which is more better the first they come on your blog and then they read or add comment on it.
One more powerful merit of the comment system is thats links that shown in the box are not cowled by the search engines which is a new way to avoid the spam, you can easily control the spam by adding it to your site or any blog.
I am also using the Google plus comment system becauses its more elegant and powerful then any other.
If you Have Any problem Contact me Thank you ....
How To Install The Favicon To Blogger
Here the complete and easy method to install the favicon to the website which use blogger. You can add favicon to the blog in many ways like going to blogger html section >> then editing the blogger themeto add the favicon, but here i am gonna share you the easy way to install the icon to your blog just as clicking no code need to puts..
Now what you have to do just follow these simples steps.
- Open your blogger blog dashboard.
- Click the Drop-Down arrow and go to the layout of your blogger blog.
- Now in upper left corner o layout you can see favicon button click on edit button.
- The new box appear and click on the brows button to insert the favicon to website.
- Now click on save.
- And next the box will close.
- You must restart the browser to see the effect, if you still now seeing favicon the you must clear the firefox, google chrome or internet explorer history to see the changes you mades.
- Here the screen shop ever step.

- Adding favicon with simple way.

- Now you have to remember these things while adding favicon
- Favicon site is not greater then 100kb
- And your favicon sized should be square in pixel like 16x16 or 32x32


Now simple save your setting and you are done. You musst restart your browser to works fine, may be there is problem in viewing the icon, you musts clear the browser history.
If there is any problem let ask in comment i am here to help you out.
How To Signup And Verify Webmasters Account 2014
Here is easy and normal way to signup for webmasters account and verify your website with it, If you are using blogger then it’s very easy, otherwise you have to do little more work like on wordpress or drupal, or joomla or you very own self-made website design. All you have to do is,
- Go to http://google.com/webmasters
- Click sign in to webmaster tools
- Now insert your Googles email account ID and Password, if you are not signup on gmail, you must register with Gmail before doing this.
- After login Click on Add Websites
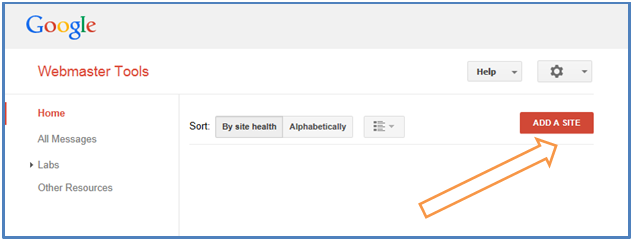
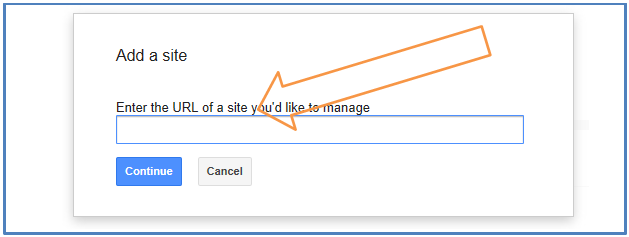
- Now enter the URL of websites that you want to add.
- If website is with www you must enter it without, and if your site is not using www then you must not enter it.
- Click Continues
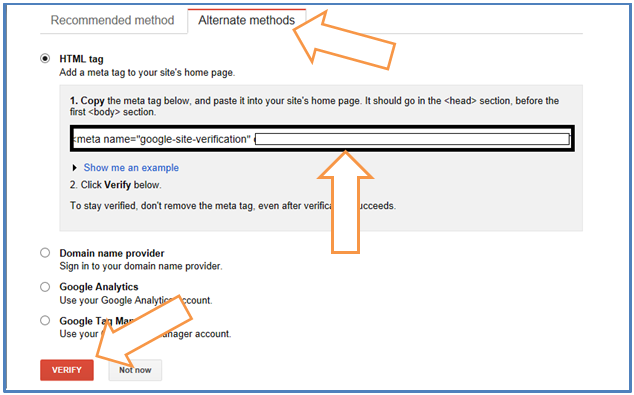
- Now you are redirected to verify it, Click alternate method.
- Simple if you are already using google analytic account just click on it and click verify.
- Otherwise Click HTML Tag.
- Copy the whole line and insert it into every page that you want to track, (If you are using your own made website).
- In advance PHP or HTML you must insert this code in index.php or index.html file.
- In blogger Edit theme from Edit Template Section, Just on first 5 to 10 lines of code you will find <head> code and just paste the copies code below it.
- Once done Click on Verify.
- If Website successfully verified massage appears then you are done and your website is verified, Now if the box still exist, and google can’t able to find the code that you inserted then might be problem with your site or you may fail to enter the code into <head> section of yours site index pages.
- If you might appear any problems while doing all of that, yours may direct comment below I try
New Version Of Vertical Floating Sharing Bar For Blogger 2014
How To Add New Floating Sharing Bar To Blogger 2014?
- First Go to Blogger Dashboard > Template
- Download a copy of your template
- Click Edit HTML
- Hit Proceed button
- Check Expand Widget Templates checkbox
- Find for below code in your template,
<b:includable id='post' var='post'>
Add below code just after/below of above code,
<b:if cond='data:blog.pageType == "item"'>
<b:if cond='data:blog.pageType != "static_page"'>
<style>
.hb_social_floating {
position: fixed;
bottom: 10%;
margin-left: -60px;
float: left;
width: 60px;
background-color: #f7f7f7;
padding: 5px 0 0px 0px;
border-top: 1px solid #ddd;
border-left: 1px solid #ddd;
border-bottom: 1px solid #ddd;
z-index: 9999px !important;
border-radius: 5px;
-moz-border-radius: 5px;
-webkit-border-radius: 5px;
}
.hb_social_floating .hb_side_social_button {
margin-bottom: 5px;
float: none;
height: auto;
width: 60px;
}
.hb_social_floating .st_twitter_vcount, .hb_social_floating.st_plusone_vcount, .st_email {
margin-left: 5px;
}
.hb_social_floating .st_fblike_vcount {
margin-left: 5px;
}
.hb_social_floating .stButton_gradient {
background: none !important;
height: 21px !important;
padding-left: 0 !important;
}
.hb_social_floating .chicklets, .hb_social_floating .stMainServices {
background: url('
http: https://blogger.googleusercontent.com/img/b/R29vZ2xl/AVvXsEjyVr1a5nQkSDFgL6j8crjPkm_tkpOr1VhNM7bDXnrXi8MhmtYXxDrN8GQVcCUR4mdOrXRhzSVonGQuTKt3qqqo4YL71xfHO-HCfBJ8Robxv42AWqRFaoBS1LLMs8V2H5DT3IBB2o9qifB2/s400/gc_social_sprite.gif'
) no-repeat !important;
height: 19px !important;
width: 45px !important;
padding: 0 !important;
}
.st_email .chicklets {
background-position: 0 -77px !important;
background-image: url('
http: https://blogger.googleusercontent.com/img/b/R29vZ2xl/AVvXsEjyVr1a5nQkSDFgL6j8crjPkm_tkpOr1VhNM7bDXnrXi8MhmtYXxDrN8GQVcCUR4mdOrXRhzSVonGQuTKt3qqqo4YL71xfHO-HCfBJ8Robxv42AWqRFaoBS1LLMs8V2H5DT3IBB2o9qifB2/s400/gc_social_sprite.gif'
) !important;
}
.hb_social_floating .st_twitter_vcount .st-twitter-counter {
background-position: 0 -58px !important;
}
.hb_social_floating .stButton_gradient {
border: none !important;
}
.hb_social_floating .stBubble_count {
width: 44px !important;
font-size: 15px !important;
font-weight: normal !important;
padding-top: 7px !important;
height: 23px !important;
background: none !important;
}
.hb_social_floating .st_twitter_vcount .stBubble_count {
color: #00a6df;
background-color: #f8fbfc !important;
}
.st_fblike_vcount {
margin-bottom: 0px;
display: block;
}
.st_twitter_vcount {
margin-bottom: 3px;
display: block;
}
.st_email {
margin-bottom: 5px;
margin-top: 3px;
display: block;
}
.hb_social_floating .stBubble {
background-position: 21px 31px !important;
height: 35px !important;
}
</style>
<div class='hb_social_floating'>
<script type='text/javascript'>var switchTo5x=true;</script>
<script src='http://w.sharethis.com/button/buttons.js' type='text/javascript'/>
<script type='text/javascript'>stLight.options({onhover:false});</script>
<span class='st_fblike_vcount' displaytext=''/>
<span class='st_twitter_vcount' displaytext='' st_via='HELPERBLOGGER'/>
<div style='margin:5px 0 0px 0;'>
<center><a class='pin-it-button' count-layout='vertical' expr:href='"http://pinterest.com/pin/create/button/?url=" + data:post.url'>Pin It</a>
<a href='javascript:void(run_pinmarklet())' style='margin-left:-46px; width:43px; height:20px; display:inline-block;'/>
<script src='http://assets.pinterest.com/js/pinit.js' type='text/javascript'/>
<script type='text/javascript'>
function run_pinmarklet() {
var e=document.createElement('script');
e.setAttribute('type','text/javascript');
e.setAttribute('charset','UTF-8');
e.setAttribute('src','http://assets.pinterest.com/js/pinmarklet.js?r=' + Math.random()*99999999);
document.body.appendChild(e);
}
</script>
</center>
</div>
<div style='margin:0px 0 0 5px;'>
<span class='st_plusone_vcount' displaytext=''/>
</div>
<div class='addthis_toolbox addthis_default_style ' style='margin:5px 0px 5px 8px;'>
<a class='addthis_counter'/>
</div>
<script src='http://s7.addthis.com/js/250/addthis_widget.js' type='text/javascript'/>
<script type='text/javascript'>
var addthis_config = {
ui_cobrand: "Helper Blogger",
ui_header_color: "#ffffff",
ui_header_background: "#CF152A"
}
</script>
<span class='st_email' displaytext=''/>
<p style=' line-height:0px; font-size:10px; font-weight:bold; text-align:center;'>
<a href='http://superbssolution.blogspot.com/' style='color:#CAC8C8;'>Widgets</a>
</p>
</div>
</b:if></b:if>
- Now replace
HELPERBLOGGERwith your twitter username in line number 107. - If you want to edit the position or background color of the bar then edit the lines from6 to 10.
Finally save your template and you are done!
Credits
This version of vertical floating sharing bar is designed by Mohammad of My Blogger Tricks,So I give all credits to him,also if you want to share this widget with your readers then kindly link back to his article.Beautiful Email Subscription Forms For Blogger

How To Add Email Subscription Forms To Blogger
- First select your form
- Copy the code of that form
- Replace my username with yours
- Go to Blogger Dashboard > Layout
- Click on Add a Gadget
- Select HTML/JavaScript
- Paste code and save it.
Email Form Style 1

<style type="text/css">
#helperblogger-emailbox {
    background: url(https://blogger.googleusercontent.com/img/b/R29vZ2xl/AVvXsEg3OJO3xfICGR5ceX0LHXV1cZ_yOVIPU_xCRnaoUNKvqFVKfCFan6-AcZtwadMKr8qq497xLPjBX0fZK4ZWPPerlGjturc79JySdtkkTEejJVy16XykMFirtxENeTO0z1437zUwegGgY1o/s1600/helperblogger.com-blue.png)no-repeat scroll center center transparent;
    height: 143px;
    width: 368px;
}

form#helperblogger-emailform {
    display: block;
    margin: 0;
    padding-left: 42px;
    padding-top: 67px;
}

form#helperblogger-emailform #s {
    background: transparent;
    border: none;
    color: #444242;
    font-family: georgia;
    font-size: 15px;
    font-style: italic;
    height: 30px;
    margin-top: -2px;
    padding-left: 2px;
    vertical-align: top;
    width: 227px;
}

form#helperblogger-emailform #sbutton {
    background: transparent;
    border: none;
    cursor: pointer;
    height: 30px;
    padding-right: 45px;
}</style>

<div id="helperblogger-emailbox">
    <form id="helperblogger-emailform" action="http://feedburner.google.com/fb/a/mailverify"
    method="post" target="popupwindow" onsubmit="window.open('http://feedburner.google.com/fb/a/mailverify?uri=Superbssolution', 'popupwindow', 'scrollbars=yes,width=550,height=520');return true">
        <input type="hidden" value="Superbssolution" name="uri" />
        <input type="text" id="s" name="email" value="Enter Your E-Mail Here"
        onfocus='if (this.value == "Enter Your E-Mail Here") {this.value = ""}'
        onblur='if (this.value == "") {this.value = "Enter Your E-Mail Here";}'
        />
        <input type="hidden" name="loc" value="en_US" />
        <input type="image" src="http://img1.blogblog.com/img/blank.gif" id="sbutton"
        />
    </form>
</div>
Email Form Style 2

<style type="text/css">
#helperblogger-emailbox {
    background: url(https://blogger.googleusercontent.com/img/b/R29vZ2xl/AVvXsEhk9tdZVEPh_M8ayBKqYtpITXmh4nnloNqlaC5G8E-8_dN2Jts7xrBWJDLvjI1KL1UdazxmZcHGwZOZAJ7WI1E2fapnUFZJY61wBTa36HUajC1VJ-8B2rFWq0LP-1-SNLGX5X4F_3eEIxg/s1600/helperblogger.com-silver.png)no-repeat scroll center center transparent;
    height: 143px;
    width: 368px;
}

form#helperblogger-emailform {
    display: block;
    margin: 0;
    padding-left: 42px;
    padding-top: 67px;
}

form#helperblogger-emailform #s {
    background: transparent;
    border: none;
    color: #444242;
    font-family: georgia;
    font-size: 15px;
    font-style: italic;
    height: 30px;
    margin-top: -2px;
    padding-left: 2px;
    vertical-align: top;
    width: 227px;
}

form#helperblogger-emailform #sbutton {
    background: transparent;
    border: none;
    cursor: pointer;
    height: 30px;
    padding-right: 45px;
}</style>

<div id="helperblogger-emailbox">
    <form id="helperblogger-emailform" action="http://feedburner.google.com/fb/a/mailverify"
    method="post" target="popupwindow" onsubmit="window.open('http://feedburner.google.com/fb/a/mailverify?uri=Superbssolution', 'popupwindow', 'scrollbars=yes,width=550,height=520');return true">
        <input type="hidden" value="Superbssolution" name="uri" />
        <input type="text" id="s" name="email" value="Enter Your E-Mail Here"
        onfocus='if (this.value == "Enter Your E-Mail Here") {this.value = ""}'
        onblur='if (this.value == "") {this.value = "Enter Your E-Mail Here";}'
        />
        <input type="hidden" name="loc" value="en_US" />
        <input type="image" src="http://img1.blogblog.com/img/blank.gif" id="sbutton"
        />
    </form>
</div>
Email Form Style 3

<style type="text/css">
#Superbssolution-emailbox {
    background: url(https://blogger.googleusercontent.com/img/b/R29vZ2xl/AVvXsEh6_KLfTWp8QJqoVO8poEQ_a9VXVd2RxqgimWYiMczGawxzsJb9Hvzqfcu2j-1oY7wXgJgQzXNUse_tE2xyR9k8LjdaSgRyInWHkSZ7ZJzL62PMoFjaWTpq6liXxR1HW_SV2IZnaMobX5A/s1600/helperblogger.com-red.png)no-repeat scroll center center transparent;
    height: 143px;
    width: 368px;
}

form#Superbssolution-emailform {
    display: block;
    margin: 0;
    padding-left: 42px;
    padding-top: 67px;
}

form#helperblogger-emailform #s {
    background: transparent;
    border: none;
    color: #444242;
    font-family: georgia;
    font-size: 15px;
    font-style: italic;
    height: 30px;
    margin-top: -2px;
    padding-left: 2px;
    vertical-align: top;
    width: 227px;
}

form#helperblogger-emailform #sbutton {
    background: transparent;
    border: none;
    cursor: pointer;
    height: 30px;
    padding-right: 45px;
}</style>

<div id="helperblogger-emailbox">
    <form id="helperblogger-emailform" action="http://feedburner.google.com/fb/a/mailverify"
    method="post" target="popupwindow" onsubmit="window.open('http://feedburner.google.com/fb/a/mailverify?uri=Superbssolution', 'popupwindow', 'scrollbars=yes,width=550,height=520');return true">
        <input type="hidden" value="Superbssolution" name="uri" />
        <input type="text" id="s" name="email" value="Enter Your E-Mail Here"
        onfocus='if (this.value == "Enter Your E-Mail Here") {this.value = ""}'
        onblur='if (this.value == "") {this.value = "Enter Your E-Mail Here";}'
        />
        <input type="hidden" name="loc" value="en_US" />
        <input type="image" src="http://img1.blogblog.com/img/blank.gif" id="sbutton"
        />
    </form>
</div>
- Replace Superbssolution with your feedburner username in line number 39 and 40.
I hope that you will not face any problem while implement it into your blog.If you are getting then throw the problem in the comment bin :) - See more at: http://www.helperblogger.com/2012/06/beautiful-email-subscription-forms-for.html#sthash.0UzsdKR2.dpuf


